
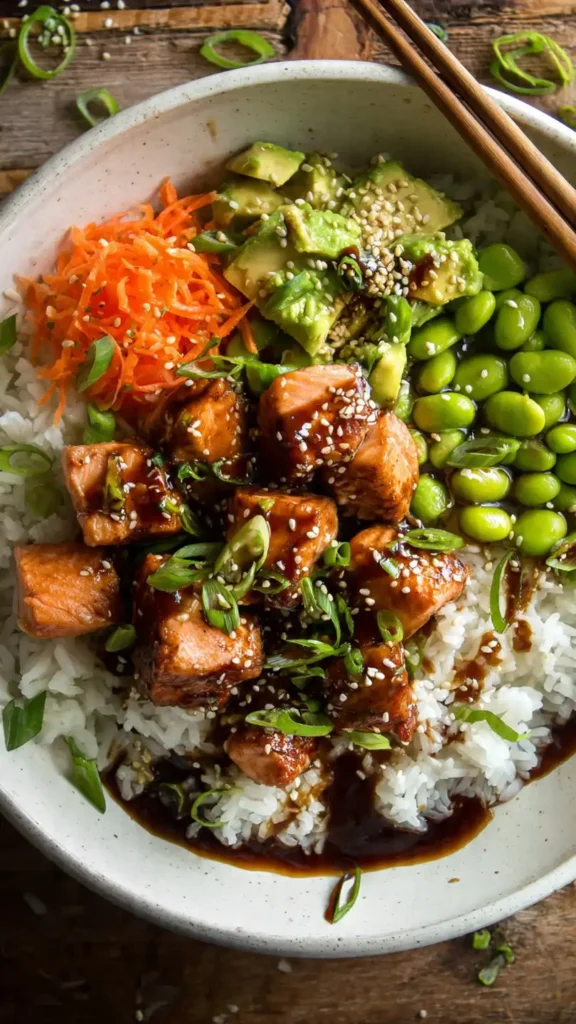
Teriyaki Salmon Rice Bowl with Edamame
Okay, so the first time I made a Teriyaki Salmon Rice Bowl, I way over-cooked the salmon. Like, completely ruined it. It was dry, weirdly chewy, and the teriyaki sauce basically just… sat on top like it gave up. My husband ate it anyway because he’s supportive like that, but I could see it in his eyes. Disappointment. Total disappointment.
But I kept trying. Because honestly? The idea of this bowl is too good to abandon.
And now? This is in our regular dinner rotation. My 9-year-old actually requests it, which is saying a LOT because she normally refuses anything that looks “too shiny.” Whatever that means.
Table of Contents :
What Makes a Teriyaki Salmon Rice Bowl So Good?
The short answer: balance. You’ve got the sweet-savory glaze on the salmon, fluffy rice underneath soaking up all those drips, bright green edamame for a little pop of color and protein, and then whatever toppings you’re feeling that day.
It’s filling without being heavy. It feels healthy but doesn’t taste like punishment food. And it comes together in under 30 minutes on a regular weeknight, which is honestly the real reason I keep making it.
I think I first got the idea from watching some food reel on Instagram… or maybe it was a recipe my coworker Jen mentioned? Either way, I’ve tweaked it enough that I feel comfortable calling it mine now.
Ingredients for This Teriyaki Salmon Rice Bowl Recipe
A few notes before we get into the list, because shopping for this stuff taught me some things the hard way.
The salmon: please, please buy it fresh if you can. I’ve done frozen and it works fine honestly, just thaw it in the fridge overnight and pat it VERY dry before cooking. Wet salmon = bad sear. Learned that one after a sad, steamy, flavorless attempt in January.
For the soy sauce, I use Kikkoman low sodium. Not sponsored, just genuinely what’s always in my cabinet.
And edamame: frozen shelled edamame from the freezer section. Done. Easy. No drama.
For the teriyaki sauce (homemade, and yes it’s worth it):
- 3 tablespoons low sodium soy sauce
- 2 tablespoons mirin
- 1 tablespoon sake (or dry sherry if that’s what you’ve got)
- 1 tablespoon honey
- 1 teaspoon fresh grated ginger
- 1 small garlic clove, minced
- 1 teaspoon cornstarch mixed with 1 tablespoon cold water
For the bowls:
- 4 salmon fillets (about 5-6 oz each), skin on or off, your call
- 1 tablespoon neutral oil (vegetable or avocado)
- 2 cups dry short-grain white rice (cooked according to package)
- 1.5 cups frozen shelled edamame, thawed
- 1 medium carrot, julienned or shredded
- 2 green onions, sliced thin
- 1 tablespoon sesame seeds
- 1 teaspoon sesame oil (for drizzling, optional but I never skip it)
- Salt and pepper for the salmon
Optional toppings:
- Sliced avocado
- Cucumber rounds
- Pickled ginger
- Sriracha or chili crisp (my personal addiction)
How to Make This Teriyaki Salmon Rice Bowl Easy
Step 1: Cook your rice first
Get your rice going before anything else. I use a regular pot on the stove, 2 cups rice to about 2.5 cups water, bring to boil, cover, reduce to low for 15 minutes. Then I leave it covered off heat for another 5 minutes. Fluffy every time.
Side note: some people swear by a rice cooker for this. I actually tested a teriyaki salmon rice cooker method where you cook everything together, but I found the salmon texture weird that way. Separate cooking is just better.
Step 2: Make the teriyaki sauce
In a small saucepan over medium heat, combine the soy sauce, mirin, sake, honey, ginger, and garlic. Stir it together and let it come to a gentle simmer. It’ll smell AMAZING. Like, neighbors-knocking-on-the-door amazing.
Once it’s simmering, stir in your cornstarch slurry (that’s the cornstarch mixed with cold water). Keep stirring for about 1-2 minutes until the sauce thickens slightly and coats the back of a spoon. Take it off heat. Done. Set aside.
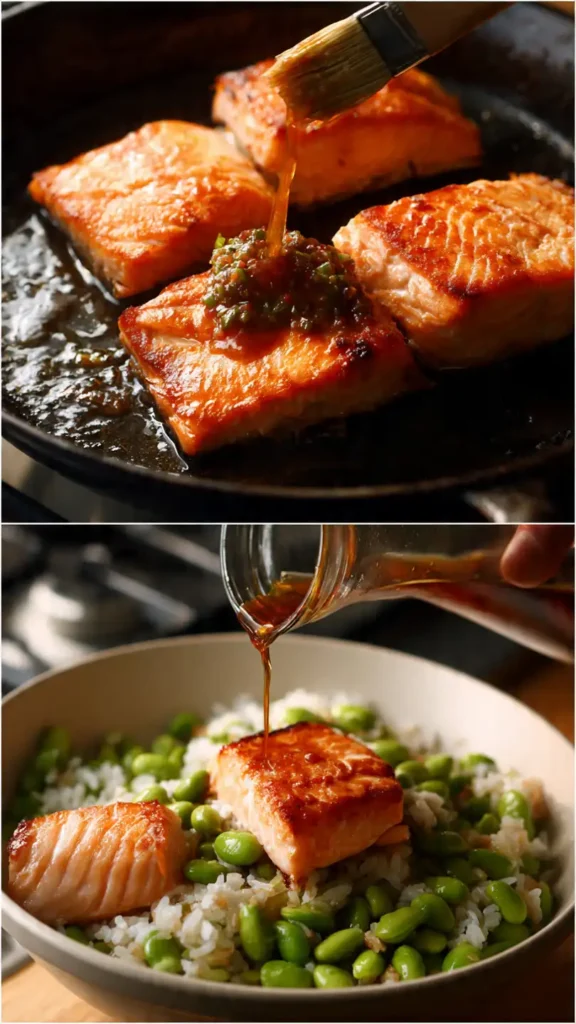
Step 3: Cook the salmon
Pat your salmon fillets dry. This is not optional. Seriously. Do NOT skip drying the salmon. Moisture is the enemy of a good sear.
Season both sides lightly with salt and pepper.
Heat your oil in a skillet (I use a cast iron, but any non-stick works) over medium-high heat. When the oil shimmers, lay the salmon in carefully, away from you.
Cook for about 3-4 minutes per side depending on thickness. You’re looking for the flesh to turn from dark pink to a lighter, more opaque pink as it cooks up from the bottom. Don’t poke it constantly. Just let it cook.
Flip once. Cook another 3 minutes. In the last minute, spoon or brush about half the teriyaki sauce over the salmon and let it caramelize slightly.
Remove from heat and let it rest for 2 minutes. Then either leave the fillets whole or break them into large chunks with a fork. Both work.
Step 4: Prep your toppings
While the salmon rests, quickly warm the edamame (I just pour boiling water over the frozen ones and drain after 2 minutes), shred or julienne your carrot, slice your green onions.
If you’re doing avocado, slice it now.
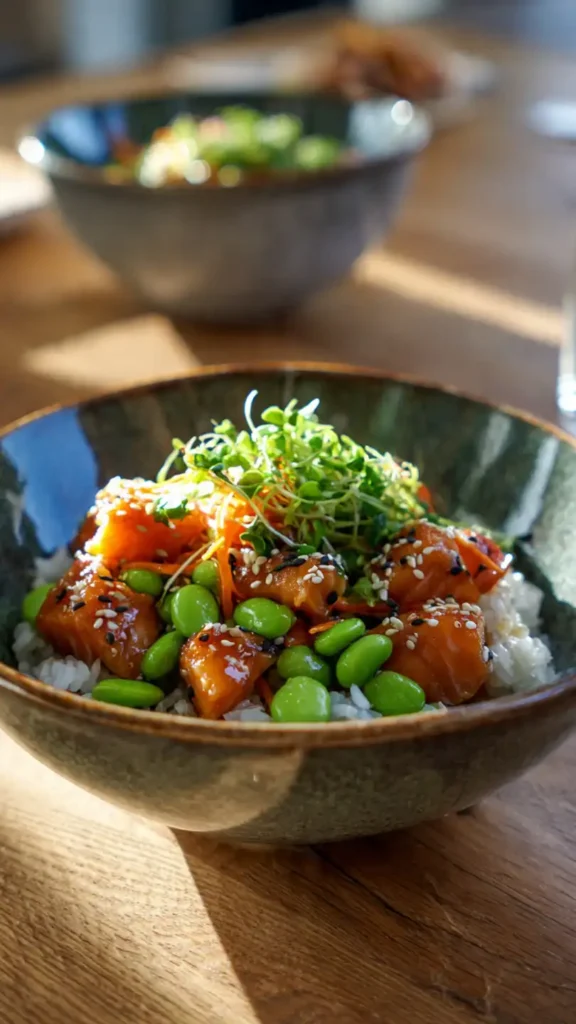
Step 5: Assemble the bowls
Okay here’s the fun part. Scoop a generous amount of rice into each bowl. Arrange your salmon on top (or to the side, however you like it visually). Add the edamame, carrot, and any other toppings.
Drizzle the remaining teriyaki sauce over everything. Add a tiny drizzle of sesame oil. Sprinkle sesame seeds and green onions.
That’s it. You’re done. It looks beautiful and it took less time than ordering delivery.
Tips, Variations, and Things I Learned the Messy Way
On the air fryer version: I’ve made teriyaki salmon rice bowl air fryer style a bunch of times for nights when I don’t want to stand at the stove. 400°F for about 8-10 minutes, brush sauce on halfway through. Works great. Skin gets a little crispier which my husband loves.
Teriyaki salmon with black rice: This is actually my favorite fancy version. Black rice takes longer to cook (about 35 minutes), but the nutty flavor and the dramatic dark color against the salmon is just gorgeous. Do it when you want to impress someone.
On the “easy” claim: Look, it IS easy, but only if your rice is already going and your sauce is prepped. Multitask. Otherwise you’ll be eating at 9pm and nobody wants that.
My biggest tip: Make double the teriyaki sauce. Always. Use half for cooking, save half for drizzling. Store extra in the fridge for up to a week. I put it on everything. Literally everything.
Don’t bother with: Store-bought teriyaki sauce for this one. I’ve tried it. Kikkoman’s bottled version, Soy Vay, a couple others. They all taste fine but a little artificial compared to this homemade version. The fresh ginger alone makes a massive difference.
On rice: Short grain white rice is my go-to. It’s stickier, which means it holds together nicely in the bowl instead of flying everywhere when you eat. I also tried this as teriyaki salmon rice noodles once, swapping the rice for cooked soba noodles. Actually really good! More of a teriyaki salmon noodle bowl at that point, but still delicious.
Why This Bowl Works for Weeknights
It’s just practical. Most of the ingredients live in my pantry or freezer. The fresh stuff is minimum: salmon, maybe a carrot and some green onions. Even on a totally chaotic Tuesday after soccer practice and three work emails I forgot to answer, I can pull this together.
And it reheats okay the next day if you keep the components separate. Rice and salmon in one container, toppings in another. Reheat rice and salmon gently, then assemble fresh. Don’t microwave the avocado though. Just don’t.
If you try this Teriyaki Salmon Rice Bowl, seriously, let me know how it goes. Drop a comment, tell me what toppings you used, tell me if your version came out better than mine. (It might. And that’s fine. That’s the whole point of sharing recipes.)
If I can make this without wrecking the salmon three times first, you can definitely nail it on your first try.
Happy cooking! And may your smoke alarms stay quiet.
An easy Teriyaki Salmon Rice Bowl with homemade teriyaki glaze, fluffy short-grain rice, edamame, and fresh toppings. Ready in under 30 minutes.Teriyaki Salmon Rice Bowl with Edamame
Ingredients
0/16
Instructions
0/5
Did you love this recipe?
Share it with your friends & family!


Leave a Comment