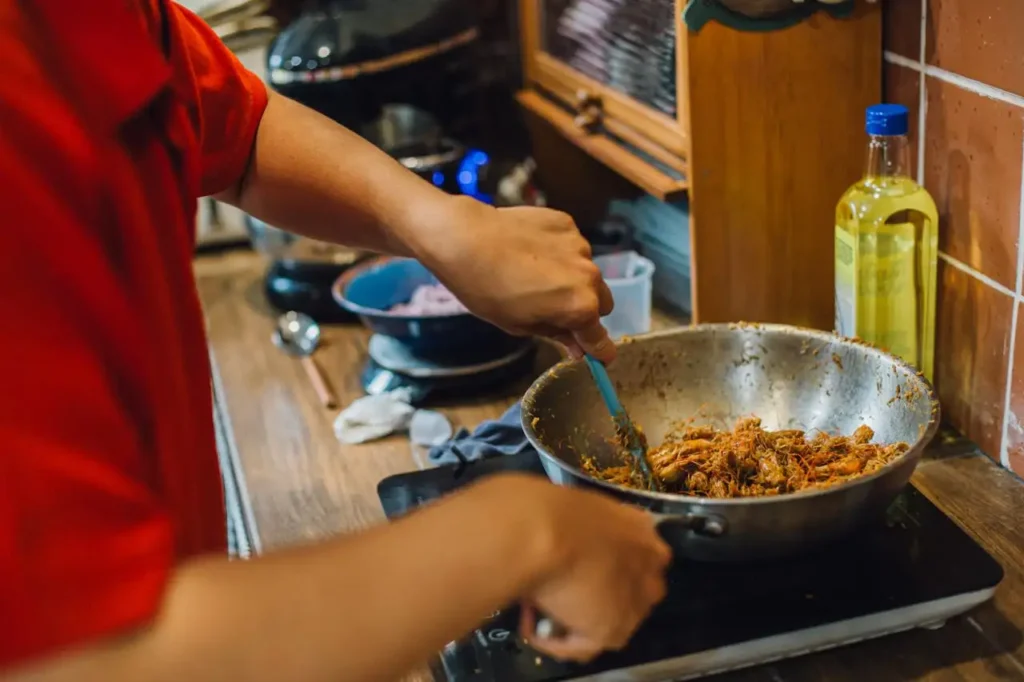
Last Tuesday I made a big batch of chicken tikka masala, felt really proud of myself, and then just… left the kitchen. Pots soaking, spices scattered, cutting board stained orange. By morning, the dried turmeric had bonded to my white ceramic bowl like concrete, and I spent twenty minutes doing what should have been a two-minute rinse. That’s when a solid kitchen cleaning routine stops being optional, and starts being the thing that makes cooking actually sustainable.
I’ve been cooking seriously for over seven years and I still have to fight the urge to walk away from the mess. But I’ve learned, mostly through painful experience, that there’s a real method to post-cooking cleanup that takes about a third of the time once you stop doing it backward.
Table of Contents :
Why Your Kitchen Cleaning Routine Starts Before You Finish Cooking
Most people think of cleaning as what happens after the meal. But the hardest messes to clean are the ones you let set.
Here’s the food science behind it: proteins denature and bond to surfaces when they cool. Fat solidifies and grips onto any texture, including the grooves in cast iron and the underside of pot lids. Starches gelatinize into a nearly waterproof film if you leave a pasta pot sitting for a few hours. That’s not a metaphor. Heat breaks these bonds; absence of heat locks them in.
So the first move in any post-cooking cleanup is actually mid-cooking: fill the pot or pan with water the second you empty it. Don’t wait until dinner’s done. Pull the pasta, plate it, immediately run hot water into that pot. It takes four seconds and saves you eight minutes later.
Quick Fix: As soon as you finish using a pot or pan, fill it with hot water right away. You’re not washing it, you’re just stopping the countdown clock on how hard that mess gets.
Step-by-Step Kitchen Cleaning Routine That Actually Holds Up
Here’s the order that makes the whole thing faster, not just the order that feels right.
- Clear the counters first. Wipe down empty surfaces before anything else. If you try to clean around dishes, you miss half the grease and end up moving things twice.
- Scrape everything into the trash or compost. Every dish, pot, and pan. Don’t rinse yet, just scrape. This prevents food from going down the drain and slowing it over time.
- Fill the sink with hot soapy water and submerge everything that can be submerged. Cast iron, wooden spoons, and non-stick pans stay out. Everything else gets a soak.
- Wipe down the stovetop while it’s still warm, not hot. Warm = the grease hasn’t re-hardened. Hot = you’ll burn yourself. The window is usually about five to eight minutes after you finish cooking.
- Wash dishes heaviest to lightest. Pots first, then pans, then plates, glasses last. This keeps your water cleanest longest, so you’re not re-coating your glasses in the grease you just cleaned off a skillet.
- Dry and put away as you go. Drying racks left overnight collect ambient kitchen grease and airborne food particles. Sounds paranoid, but it’s real.
The Stovetop Is Lying to You
Here’s something I figured out after years of surface-level wiping that never quite felt clean: stovetop grime has layers, and most people only clean the top one.
The visible splatter is easy. What’s underneath that, baked into the area around burners, is a combination of volatilized cooking oil and carbonized food particles that have been accumulating since the last time you deep cleaned. This layer is practically invisible unless you catch it in raking light, like sunlight coming in low across the surface. It feels slightly tacky and it smells faintly, especially when the burners heat up.
Regular dish soap doesn’t cut it because this residue is mostly polymerized fat, and polymerized fat is chemically resistant. What does work: a paste of baking soda and a small amount of dish soap, left on the surface for about three minutes, then scrubbed with a damp non-scratch pad. The baking soda is mildly abrasive and slightly alkaline, which helps break down the fat chains.
I started doing this every Friday regardless of how the stovetop looks, not when it’s visibly dirty. That’s the habit that finally fixed it.
What I Do Now: Every Friday I make a quick baking soda paste, put it on the stovetop, and wash dishes while I let it sit. By the time the dishes are done, the paste has done its work. The whole thing adds maybe four minutes to my routine.
The One Thing You’re Probably Skipping in Your Kitchen Cleaning Routine
Ventilation hood filters. Specifically, the grease filters over your range.
I have literally never seen another home cook mention this, and most people haven’t cleaned theirs in months or years. Those filters are designed to catch aerosolized grease before it coats your cabinets, walls, and ceiling. When they’re saturated, they stop working, and all that grease lands somewhere else instead.
The filters are usually removable. On most hoods, you just slide or unclip them out. They’re almost always aluminum mesh, and they clean up well with hot water, dish soap, and a soft brush, or you can run them through the dishwasher on a hot cycle. The before-and-after is startling the first time you do it.
I clean mine monthly now. If you cook with a lot of oil, every three weeks is more realistic. Your cabinets will thank you and, honestly, your kitchen will smell noticeably better when you cook, because you’re not reheating six months of accumulated grease residue every time the hood runs.
Cutting Boards Deserve More Than a Rinse
The thing about cutting boards, especially wooden ones, is that a quick rinse under water does almost nothing for them. Water doesn’t sanitize. It also opens the wood grain and, if you let moisture sit, creates exactly the conditions bacteria prefer.
For plastic cutting boards, hot water plus dish soap scrubbed vigorously does the job. But for any board that’s been used for raw meat, you need a sanitizing step. A simple solution of one tablespoon of unscented liquid chlorine bleach per gallon of water, applied for two minutes and then rinsed, is what the USDA actually recommends.
For wooden boards, skip the bleach. It dries out the wood and causes cracking. Instead, scrub with coarse salt and half a lemon; the salt physically scrubs while the lemon juice acts as a mild antibacterial. Let wooden boards dry standing upright, not flat. Flat drying means one side stays damp and the board warps. I learned this after ruining a beautiful walnut board I’d spent real money on.
A Kitchen Cleaning Routine Isn’t About Perfection
I want to be honest about something: the first few weeks I built this routine, I skipped steps constantly. I still do sometimes. The stovetop wipe didn’t happen because I was tired. The cutting board got left flat to dry.
The goal isn’t a flawless kitchen every night. The goal is a baseline that makes the next time you cook easier and more enjoyable. When your kitchen is reasonably clean before you start, the actual cooking is better, because you have space to work and you’re not cooking with yesterday’s grease on the burners.
Get the routine solid on the nights when you have energy. On the hard nights, at minimum fill those pots with water and wipe the stovetop. Everything else can wait until morning.
You Can Check Also :
How to Cook Chicken Perfectly Every Time (Juicy, Tender & Never Dry)
10 Common Cooking Mistakes Beginners Make (And How to Fix Them Fast)
How to Read a Recipe Properly Before Cooking (Avoid Common Mistakes)
FAQ
What is the most efficient kitchen cleaning routine after cooking?
The most efficient post-cooking routine follows a specific order: fill pots with water immediately while cooking, then clear counters, scrape dishes, soak everything except cast iron and non-stick, wipe the stovetop while warm, wash heavy to light, and dry and put away same night. Doing this in sequence cuts total time roughly in half compared to cleaning in whatever order feels natural.
Should you clean the kitchen right after cooking or let it sit overnight?
For most surfaces, cleaning right after cooking is significantly easier because heat keeps grease and proteins soft and removable. Letting dishes sit overnight means fats solidify and proteins bond to surfaces, which can double your scrubbing time. The exception is if you’re simply too exhausted: fill pots with water immediately, and the overnight soak will handle most of the hard work.
Does soaking dishes in hot water actually work?
Yes, but the temperature matters more than the time. Hot water stays effective at loosening food for the first thirty minutes or so, then cools and becomes less useful. For stuck-on food, a soak of fifteen to twenty minutes in genuinely hot water plus a small squirt of dish soap is usually enough to loosen almost anything. Adding more soap doesn’t help as much as keeping the water hotter.
How often should you deep clean the kitchen after regular cooking?
For most home cooks who cook several times a week, a light daily cleanup plus one deeper session weekly works well. The deeper session should include stovetop paste treatment, checking the range hood filter, sanitizing cutting boards, and wiping down the inside of the microwave. If you cook with a lot of oil or high heat, weekly is the right interval for stovetop deep cleaning.
Why does my kitchen still smell after cleaning it?
The most common culprit is the range hood grease filter, which most people never clean. A saturated filter re-releases trapped cooking odors every time the hood runs. Other sources are the garbage disposal, which benefits from a rinse with ice, salt, and lemon peel, and dish sponges, which accumulate bacteria rapidly and should be replaced every one to two weeks or microwaved damp for ninety seconds to reduce bacterial load.