
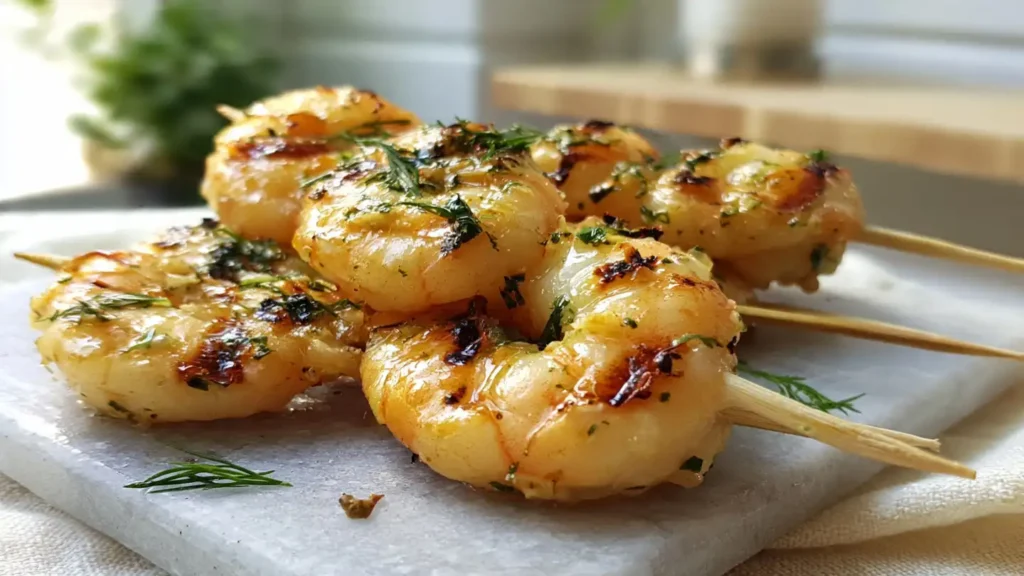
Grilled Shrimp Skewers with Garlic Herb Marinade (Easy Summer Dinner)
The first time I made these grilled shrimp skewers, I marinated the shrimp for a full hour because I got distracted cleaning up the kitchen (toddler had just launched a spoon across the room, priorities shift fast around here). By the time I threaded them onto skewers, the edges already looked slightly opaque. That’s the lemon juice starting to “cook” the shrimp before it ever touches the grill, and it taught me exactly why one recipe I’d read warned against marinating past an hour.
Now I know better. This version keeps the marinade quick, the grill time short, and the whole dinner on the table in about twenty minutes. It’s become our go-to for warm nights when nobody wants to be stuck inside.
Table of Contents :
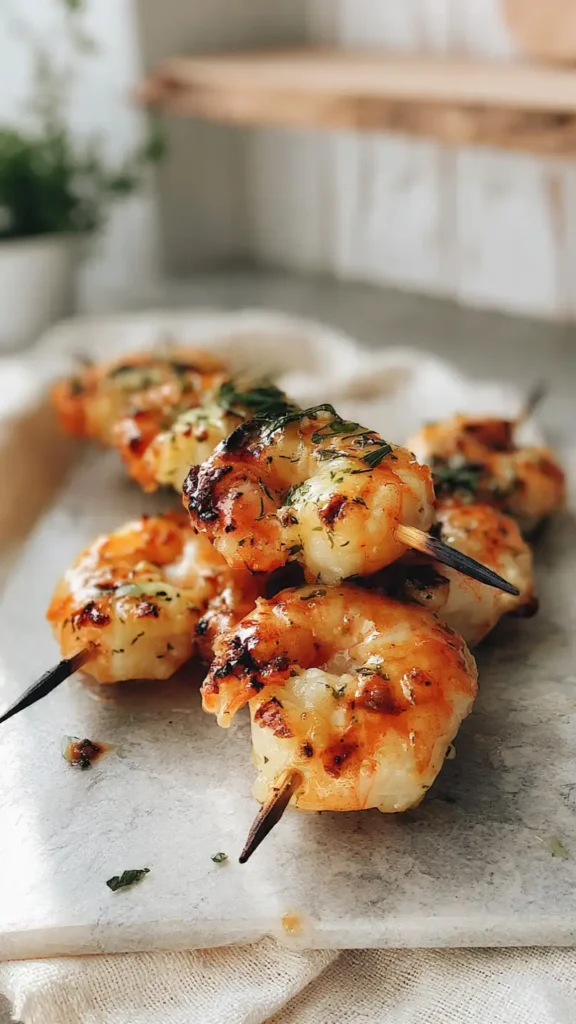
Why You’ll Love This Recipe
- Ready in 21 Minutes: Start to finish, including a real marinating window, not a rushed one.
- Bright, Garlicky Flavor: Fresh lemon, garlic, and herbs do the heavy lifting, no long ingredient list required.
- Grill or Grill Pan: Works on an outdoor grill or a stovetop grill pan, so weather isn’t a dealbreaker.
- Kid-Friendly Base: My older one still won’t touch the herbs, but she’ll eat the shrimp plain off the skewer (a small win, but I’ll take it).
- Easy to Scale: Doubles cleanly for a bigger crowd without changing the timing.
Quick Recipe Snapshot
Prep Time: 15 min
Cook Time: 6 min
Total Time: 21 min
Servings: 4
Difficulty: Easy
Cost: Budget-friendly
Recipe Background
Grilled shrimp skewers show up on nearly every summer recipe list, and for good reason (they cook fast and taste like you tried harder than you did). But dig into a handful of recipes and you’ll notice they don’t agree on much beyond “marinate it, then grill it.”
Marinating time is where the disagreement gets real. Some recipes call for just 15 minutes. Others push to 30. One source I came across was blunt about the risk: leave shrimp in a citrus marinade too long and the acid starts denaturing the proteins the same way it does in ceviche, no heat required. That’s not a minor style difference, that’s the line between snappy shrimp and mushy shrimp.
What I Do Differently (and Why It Works)
After that first distracted batch, I dialed in on 20 to 25 minutes for the marinade. It sits right in the middle of the 15-to-30-minute range other recipes argue over, long enough for the garlic and lemon to actually flavor the shrimp, short enough that the acid doesn’t start “cooking” them prematurely.
On the grill, I stopped second-guessing myself and settled on 3 minutes per side over medium-high heat. I pull the shrimp the moment they turn solidly pink and opaque, with light char just starting to form and that faint sizzle-then-quiet sound as the surface moisture cooks off.
One more small thing that made a real difference: I thread only 4 shrimp per skewer instead of 5. It sounds fussy, but the extra space gives each shrimp better contact with the grates, which means more even char across the whole batch.
What Actually Matters Here
Ingredients For Grilled Shrimp Skewers
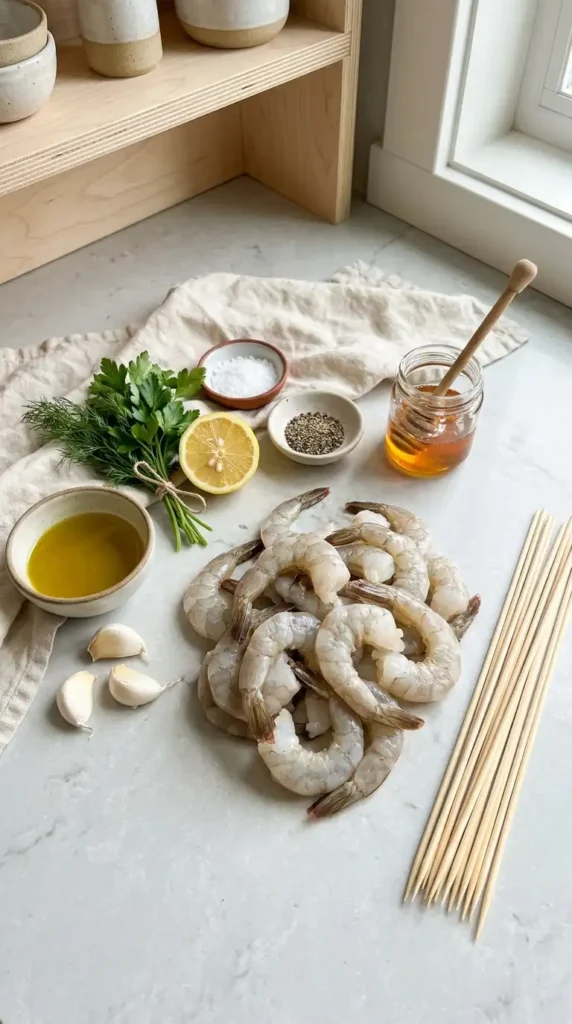
- Large or jumbo shrimp, peeled and deveined, tails on: 1 to 1.5 lbs
- Olive oil or avocado oil: 3 tbsp
- Garlic, minced: 3 cloves
- Fresh lemon or lime juice: 1 lemon or lime, juiced (about 2 to 3 tbsp)
- Fresh herbs (parsley, dill, or basil), chopped: 2 tbsp combined
- Salt: 1/2 tsp
- Black pepper: 1/4 tsp
- Honey (optional): 1 to 2 tbsp, for a touch of caramelization on the grill
- Italian seasoning or smoked paprika (optional): 1/2 to 2 tsp, adjust to taste
- Wooden or metal skewers: 8 to 12 (10-inch), soaked 20 to 30 minutes if wooden
Variations and Substitutions
- Swap the oil for butter or ghee: Richer flavor and a slightly different mouthfeel, a nice Paleo-friendly option if that matters to your household.
- Use dried herbs instead of fresh: Works in a pinch, though the flavor comes through milder and less bright.
- Switch to metal skewers: Skips the soaking step entirely, just handle with care since metal holds heat longer than wood.
- Add the honey: Genuinely worth it if you want that light caramelized edge where the marinade meets the grill.
- Lean into smoked paprika: A small addition that pushes the flavor toward smoky instead of purely bright and garlicky.
Equipment You’ll Need
- 10-inch bamboo or metal skewers (bamboo needs soaking, metal doesn’t)
- A grill, grill pan, or cast iron surface that gets properly hot
- A small bowl or blender for the marinade
- Tongs for flipping (this is not a job for a fork, trust me)
Instructions For Grilled Shrimp Skewers
Step 1: Soak the Skewers
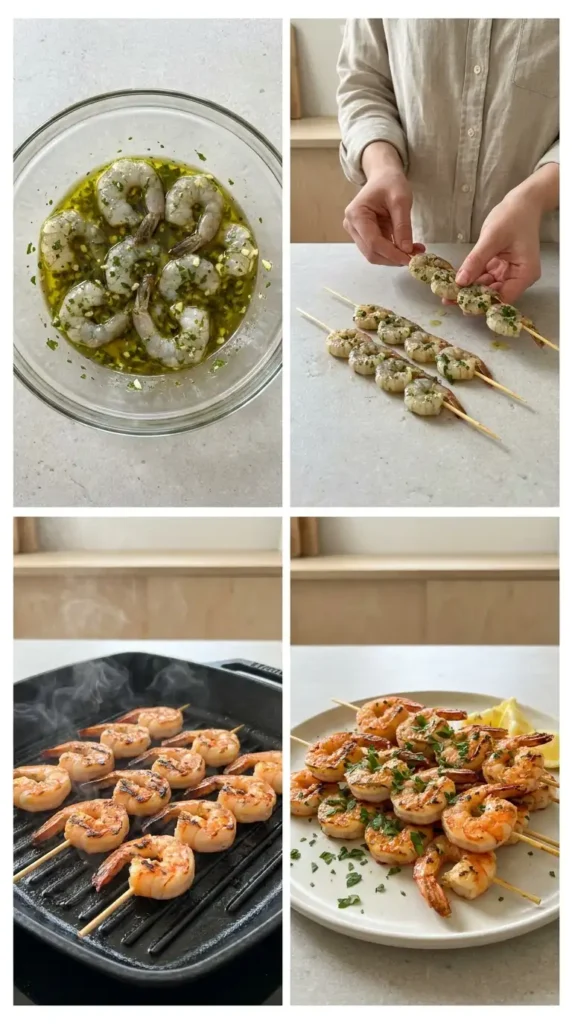
If you’re using wooden skewers, soak them in water for a full 20 to 30 minutes. Don’t shortcut this part. I skipped it once on a rushed weeknight and ended up with a scorched, splintering skewer that nearly snapped mid-flip.
Step 2: Make the Marinade
Whisk together the oil, lemon or lime juice, garlic, herbs, salt, pepper, and any optional honey or spices in a bowl. It should look loose and a little glossy, not thick.
Step 3: Marinate the Shrimp
Toss the shrimp in the marinade and refrigerate for 20 to 25 minutes. Watch the clock here (the acid works fast). If the shrimp start looking opaque at the edges before you’ve even hit the grill, that’s your sign it’s gone too long.
Step 4: Thread the Skewers
Thread 4 shrimp per skewer, leaving a little space between each piece. This small gap is what gives you better grate contact and more even char, rather than crowding them tight.
Step 5: Preheat the Grill
Get your grill or grill pan to medium-high heat before the shrimp go anywhere near it. A properly hot surface is what gives you char instead of steam.
Step 6: Grill
Grill the skewers for about 3 minutes per side. You’re looking for shrimp that are SOLIDLY pink and opaque, with light char marks starting to form. If you have an instant-read thermometer handy, the shrimp should reach an internal temperature of 145°F before you pull them, which is the FDA’s minimum safe temperature for shrimp. If yours are cooking unevenly, rotate the skewers a quarter turn rather than flipping early, that usually evens things out without overcooking the side that’s already done.
Step 7: Finish and Serve
Brush with a little reserved marinade or a fresh drizzle of oil and citrus right before serving, if you want an extra hit of brightness.
How to Store, Reheat, and Make Ahead
Fridge: Store leftover shrimp in an airtight container for a couple of days (shrimp doesn’t hold as long as heartier proteins, so don’t push it).
Freezer: Cooked shrimp can be frozen, though the texture softens some on thawing, worth knowing if you’re picky about bite.
Reheat: A quick pass in a skillet over low heat works better than the microwave, which tends to turn shrimp rubbery fast.
Make Ahead: The marinade itself can be mixed a day ahead and kept in the fridge (just don’t add the shrimp until you’re ready to cook).
Personal Tips
- Thread only 4 shrimp per skewer instead of 5. The extra breathing room genuinely improves the char.
- Don’t skip soaking wooden skewers the full 30 minutes. A splintering skewer mid-flip is not a fun surprise.
- If your marinade timing gets away from you, err short. A slightly under-marinated shrimp still tastes great. An over-marinated one turns mealy.
What to Serve With It
These skewers pair naturally with grilled vegetables like peppers, onion, and zucchini threaded on their own skewers alongside the shrimp. For a fuller summer dinner, add a simple grain like couscous or rice, plus something cold and crisp like a cucumber salad to balance the char.
What Other Recipes Get Wrong
Most recipes lean on a vague visual cue like “pink and opaque” and stop there, skipping any mention of an actual internal temperature check even though clear FDA guidance exists for exactly this. Storage and reheating instructions are also almost universally missing from published versions, which leaves home cooks guessing what to do with the inevitable leftovers.
If you’re someone who still eyeballs doneness and hopes for the best, it might be worth grabbing an instant-read thermometer and actually using it (I was skeptical too, until I stopped guessing and started checking). And if shrimp skewers become a regular thing in your house, like they have in mine, this garlic Tuscan shrimp is worth keeping in the rotation too, it’s a different vibe but scratches the same quick-dinner itch.
Nutrition Information
Per serving (estimated range, not a calculated figure):
Calories: 74 to 274
Carbs: 0 to 3g
Protein: 13 to 45g
Fat: 0.5 to 12g
Calculated based on 4 servings.
Values are estimates and vary widely depending on portion size and added oil, confirm with a real nutrition calculator before publishing if precision matters.
Frequently Asked Questions
How long should you marinate shrimp before grilling without it turning mushy?
Stick to 20 to 25 minutes. Citrus-based marinades work fast on shrimp, and going past an hour risks the acid starting to “cook” the texture before the grill does.
Can you make grilled shrimp skewers in the oven instead of on a grill?
Yes, a hot broiler or a very high oven temperature can mimic the char and quick cook time of a grill, just watch closely since shrimp cook fast either way.
What vegetables pair well with grilled shrimp skewers?
Peppers, onion, and zucchini are the classic combination, all of which grill in roughly the same window of time as the shrimp itself.
Should skewers be soaked before grilling, and for how long?
Wooden skewers need 20 to 30 minutes in water to avoid scorching or splintering. Metal skewers skip this step entirely.
What sides go well with grilled shrimp skewers for a summer dinner?
A light grain like couscous or rice and something cold and crisp, like a cucumber salad, round out the meal without competing with the shrimp’s flavor.
If you make these, I’d genuinely love to hear how the marinade timing worked out for you (drop a comment below, it helps me know what to tweak for next time). Thanks for cooking along.
Grilled Shrimp Skewers with Garlic Herb Marinade
Quick garlic herb marinade, 3 minutes per side, and dinner's done. These grilled shrimp skewers are the easy summer dinner you'll make on repeat.
Ingredients 0/10
Instructions 0/7
Did you love this recipe?
Share it with your friends & family!


Leave a Comment