
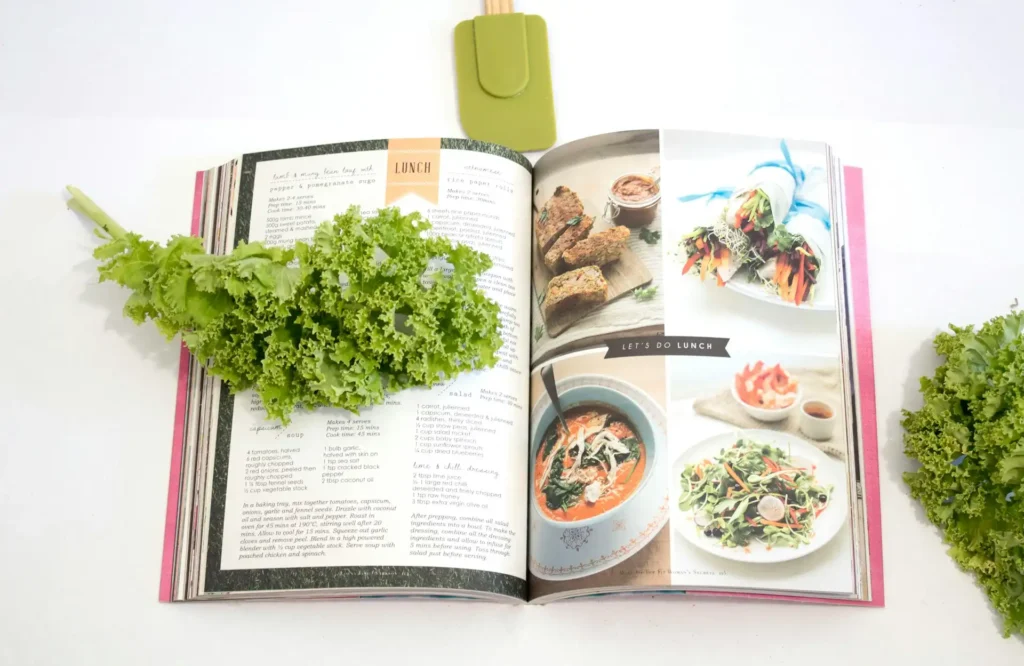
How to Read a Recipe Before You Start: A Beginner’s Guide
The butter was supposed to be soft. It said so right there in step one (cream softened butter with sugar). I was already mixing. The butter was cold and firm, and that loaf came out flat and dense, and I had no idea why until much later.
Learning how to read a recipe isn’t about literacy. It’s about knowing what to look for before you start, and most cooking mistakes happen before the stove is ever turned on.
Table of Contents :
What’s Actually in a Recipe (And Why Each Part Exists)
A recipe is structured the same way nearly every time, and understanding that structure is your first reading tool. Every component exists for a reason, and skipping over any of them sets you up for a surprise mid-cook.
The title and yield tell you what you’re making and how much, worth checking before you even look at ingredients. The time block (prep plus cook plus total) signals how to plan your day, though prep times are notoriously optimistic (more on that in a minute). The ingredients list, when written well, runs from the largest quantity to the smallest, in the order you’ll use them. The instructions carry the steps, but also hide information: prep actions, divided quantities, and timing cues that don’t appear anywhere else. Notes at the bottom are where recipe developers bury the real-world fixes that didn’t fit in the main text, things like why the batter looks curdled before it comes together (it will), or why the caramel smells almost burnt before it’s done.
Read the title, yield, and time first. Then the ingredients, top to bottom. Then the instructions once, fully, before touching anything.
Why Do Recipes Fail Even When You Follow Them?
The most common reason a recipe fails isn’t a wrong measurement. It’s a hidden step you didn’t spot during the read-through.
Hidden steps live inside ingredient lines. “¼ cup toasted walnuts” looks like a quantity, but toasting is a step, and if you catch it mid-recipe, you’re suddenly doing a separate pan task while your onions are burning. Hidden ingredients work the same way: butter that needs to be room temperature for at least an hour before you start, or broth that needs to be warm when it hits the pan. These aren’t mistakes in the recipe. They’re instructions written in shorthand that an experienced cook reads automatically.
Divided ingredients are their own trap. The “divided” label is easy to miss on a first scan, and the consequence of ignoring it isn’t dramatic. Milk listed as “divided” in a bread dough recipe doesn’t all go in at the start. Half at the beginning, half halfway through kneading. Add it all at once and the dough hydration is off from minute one (something you cannot undo once kneading is underway). The dish just comes out quietly wrong, in a way that’s hard to trace.
Quick Fix: Butter not softened and you’re already mid-recipe? Cut it into small cubes and spread them across a plate. Fifteen minutes at room temperature gets it where it needs to be. If you’re really pressed, microwave in 5-second bursts, rotating the cubes, until pliable but not melted.
Hidden Ingredients vs. Hidden Steps
These sound the same but they’re not. A hidden ingredient is something absent from the ingredient list entirely, appearing only in the instructions (a splash of vinegar stirred in at the end, a pinch of salt folded into the finishing butter). A hidden step is embedded in an ingredient line itself: “1 cup toasted pine nuts,” where toasting appears nowhere in the instructions. Scan both your ingredient list and your instructions for anything that requires advance time, heat, or equipment before the main cooking begins.
How to Read a Recipe in Three Passes: Skim, Study, Cook
The most effective way to read a recipe is in three passes, each with a specific job: skim for overview, study for mechanics, and reference as you cook. One read-through isn’t really reading it.
- Skim (2 minutes): Read for overall shape. What’s the dish? How long does it take? How many people does it serve? You’re not absorbing details yet, just understanding what you’re agreeing to make.
- Study (5–10 minutes): Read slowly, line by line. Note anything that requires advance prep: butter that needs softening, meat that needs marinating, pasta that needs pre-cooking, a sauce that has to chill. Check every ingredient against your pantry. Check every tool mentioned against your kitchen. If anything is unclear (a technique term, an unfamiliar cut, an ambiguous step), look it up before you start.
- Cook (reference as needed): Keep the recipe open and read each step immediately before you do it. Don’t rely on memory for quantities or timing. For baking especially, re-read before you add anything.
This system catches the cold-butter problem before you’ve creamed anything, the divided-quantity issue before you’ve poured it all in, and the “wait, do I actually have a springform pan?” moment before you’re elbow-deep in batter.
What “Doneness Indicators” Actually Mean
Timers are a starting point, not a finish line. When a recipe says “cook until golden brown,” the color is the instruction, not the clock. “Crisp-tender” means the vegetable bends slightly but won’t snap. “Until fragrant” means your nose decides, not your watch. A beginner who follows only the listed cook time and ignores the sensory cues will pull food too early or let it go too long, reliably. Read doneness language as a physical description of what to look for, not decorative filler.
The Comma Rule Nobody Talks About
Ingredient lines are written in a specific grammatical shorthand, and one punctuation mark changes what you do first.
“1 cup chopped walnuts” means chop the walnuts first, then measure one cup. The prep word (chopped) comes before the unit, so prep happens before measuring. “1 cup walnuts, chopped” means measure one cup of whole walnuts, then chop them. The comma tells you the prep is applied after the quantity is measured.
This is not a minor distinction. Chopped nuts pack more densely into a measuring cup than whole ones (and the same principle applies to anything that compacts or loosens with prep: grated cheese, shredded chicken, sliced cabbage). Getting this backwards can significantly alter the measured volume of an ingredient and quietly shift the ratio of something you can’t easily eyeball or correct mid-mix.
I learned this from a professional cook who looked at a batch of failed cookies with me and pointed straight at the ingredient line: “you chopped first, didn’t you.” She was right. I’d been compressing that cup of nuts in every single batch without knowing it. What I do now is read every ingredient line twice: once for the what (which ingredient), once for the when (does the prep happen before or after measuring). It sounds like a small adjustment. It’s EVERYTHING once you start catching it in recipes you’ve been making for years.
Before You Turn On the Stove: Your 5-Point Pre-Cook Checklist
The pre-cook check is the step most beginner guides mention but never make concrete. Here’s what it actually looks like.
- Pantry scan: Match every ingredient against what you have on hand. Substitutions are easier to plan before you start than to improvise mid-step, when you’re already under pressure.
- Equipment check: Read through the instructions for any tool you’ll need: a specific pan size, a thermometer, a stand mixer, a fine-mesh strainer. Missing equipment mid-recipe causes scrambling that leads to shortcuts.
- Time assessment: Add 50% to the listed prep time if you’re still building speed. The first time I timed myself on a “quick 30-minute dinner,” it took 58 minutes. That’s completely normal for a developing cook, and planning for it keeps dinner from becoming a stressful event. A recipe that promises “dinner in 30 minutes” is usually making that promise to someone who already knows the recipe.
- Advance prep flag: Everything that needs to happen before step one should start now. Softened butter needs about an hour on the counter (press a fingertip in lightly and it should leave a slight indent without feeling slippery). Marinating, defrosting, preheating. Scan for these during your study pass and write them down.
- Substitution review: If you’re missing an ingredient, make the swap decision before you start. Mid-recipe substitutions made under time pressure lead to proportion errors.
What I do now before anything hits the stove: one slow read-through with a small notebook open. I write down any advance prep, any divided ingredients, and any tools I need to pull out. Three minutes, and it has saved more dinners than I care to count.
You Can Check Also :
How to Cook Chicken Perfectly Every Time (Juicy, Tender & Never Dry)
10 Common Cooking Mistakes Beginners Make (And How to Fix Them Fast)
How to Read a Recipe Properly Before Cooking (Avoid Common Mistakes)
Frequently Asked Questions About How to Read a Recipe
How do I know if I have everything I need before I start cooking?
Run a pantry scan during your study pass: go through the ingredient list item by item and pull each one out or confirm it’s in your kitchen. Check the instructions for any equipment mentioned (specific pan sizes, thermometers, strainers). Five minutes before you start prevents the mid-recipe scramble of realizing you’re out of something critical.
Can you start cooking before reading the whole recipe?
For very simple recipes (a three-ingredient dressing, a quick scramble), skipping a full read rarely causes problems. For anything with marinating, chilling, resting, divided ingredients, or butter that needs to soften, skipping the read-through almost guarantees a mid-cook problem. The more steps a recipe has, the more everything depends on reading it first.
Does prep time on a recipe include chopping and measuring?
It’s supposed to, but recipe prep times are optimistic and assume an experienced cook working at speed. If a recipe lists 15 minutes of prep, budget closer to 25 if you’re still building your knife skills. For more complex recipes, doubling the listed prep time is a safe starting estimate until you learn how a specific recipe developer measures their timing.
What does “divided” mean in a recipe ingredient list?
“Divided” tells you the total listed amount will be split across two or more separate steps in the recipe. “2 tablespoons butter, divided” means you’ll add some now and some later. Using all of it in the first step can affect sauce consistency, dough hydration, or the texture of the finished dish, depending on what that ingredient is doing at each moment.
Why does my dish taste fine but look nothing like the recipe photo?
Three silent culprits: the comma rule (measuring in the wrong order changes ingredient ratios), pan size or type (a dark pan browns faster than a light one; a wider pan spreads food thinner), and doneness cues ignored in favor of the timer. If the dish tastes right but looks off, start with pan size and the ingredient list before assuming the recipe is the problem.
Once reading this carefully becomes a habit, SOMETHING shifts. You stop reacting to the recipe and start working ahead of it, and that’s when cooking starts feeling genuinely fun instead of frantic. If any of this changed how you looked at your recipe this week, I’d love to hear about it in the comments. And if you’re ready for the practical next step, the post on mise en place for beginners walks through exactly what to do once you’ve read it right.
Did you love this recipe?
Share it with your friends & family!
Leave a Comment