I sliced into a chicken thigh once, saw clear juices running out, and plated it confidently. Twenty minutes later, my partner quietly said it tasted a little “off.” I grabbed the thermometer, stuck it back in the leftover piece still on the pan, and got 154°F. Two degrees short. That moment taught me more about how to use a meat thermometer correctly than any recipe ever had.
The thermometer was sitting right in my drawer. I just wasn’t using it right.
Table of Contents :
Why Your Meat Thermometer Keeps Giving You Wrong Readings
This is the one nobody talks about enough, so I’m starting here.
Most beginner mistakes aren’t about forgetting to use the thermometer. They’re about where the probe tip actually ends up. The tip is doing all the work, and if it’s sitting in a fat pocket, touching bone, or only halfway into the meat, the number on the screen is basically fiction.
Fat heats up faster than muscle tissue because it has less water content and conducts heat differently. Bone conducts heat quickly too, so a probe resting against bone will read 10 to 15 degrees higher than the actual muscle temperature nearby. I learned this the hard way with a bone-in pork chop that read 165°F next to the bone but was still pink and underdone half an inch away.
Quick Fix: Before you read the temperature, wiggle the probe slightly and watch if the number jumps significantly. If it does, you’re touching fat or bone. Reposition until the reading stabilizes.
The goal is always to get the probe tip into the thickest part of the meat, away from any bone, fat seam, or the pan surface.
How to Use a Meat Thermometer: The Right Steps Every Time
These steps work whether you’re using a digital meat thermometer or an older dial-style thermometer. The mechanics differ but the placement logic is identical.
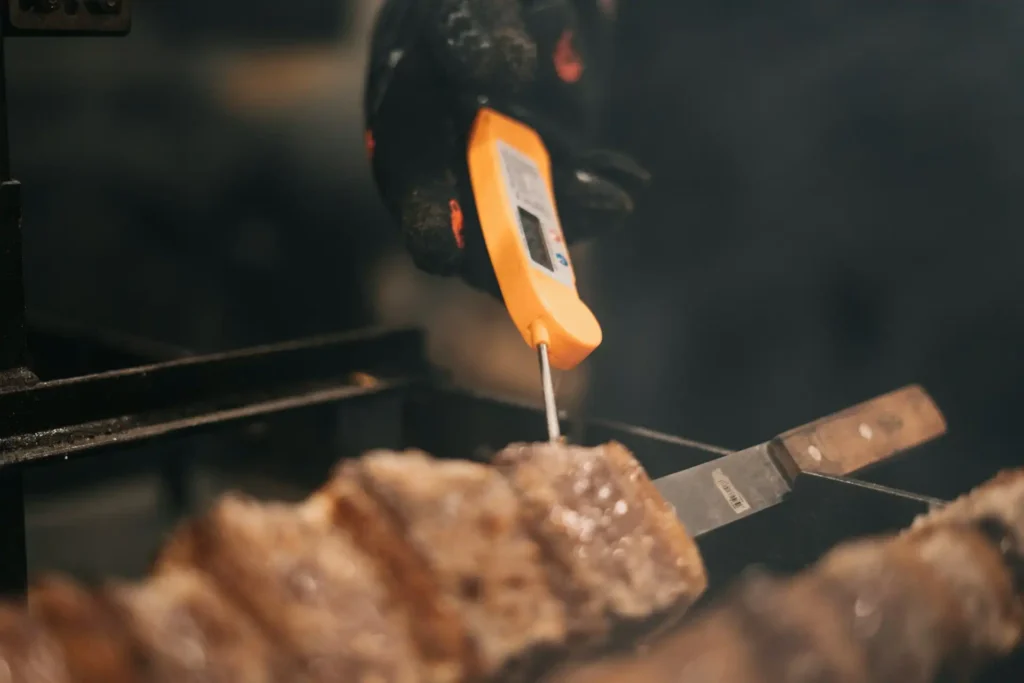
- Insert the probe into the thickest part of the meat, angling it so the tip sits roughly in the center of that mass, not near the surface.
- Wait for the reading to stabilize. A digital thermometer usually takes 2 to 5 seconds. An analog dial thermometer needs closer to 15 to 20 seconds, because the coil inside it responds more slowly to heat.
- Check that you’re not near bone, fat, or the bottom of the pan. If any of those are close, pull back and reinsert at a slightly different angle.
- For large cuts like a whole chicken or a roast, take readings in at least two spots. The breast and thigh on a whole bird can be 10+ degrees apart.
- Note the temperature, then let the meat rest. Carryover cooking will raise the internal temperature by 3 to 8 degrees after you pull it from the heat, depending on the size of the cut.
For a leave-in meat thermometer that stays in the oven during cooking, steps 1 and 3 are especially critical because you won’t be checking placement again mid-cook.
The Thin Meat Problem Nobody Explains Properly
Here’s something I figured out through frustration that I genuinely never see addressed clearly: using a meat thermometer on thin meat is a geometry problem, not just a technique problem.
A chicken breast that’s 3/4 inch thick doesn’t give you a straight vertical path to the center. If you push the probe straight down, you’ll hit the pan or cutting board before the tip reaches the middle of the meat. The solution is to go in from the side, horizontally, so the probe travels through the longest dimension of the cut.
Think of it like threading a needle through the meat sideways. For a thin steak, a chicken cutlet, or a pork chop under an inch thick, entering from the side or at a very low angle is the only way to get the tip positioned where you actually need it.
This also matters for burgers. A lot of people poke straight down into a burger patty from the top and get a surface reading. Go in from the edge, aim for the center, and you’ll get a much more honest number.
What Temperature You’re Actually Aiming For
The USDA publishes safe minimum internal temperatures, and they’re worth knowing by heart.
Here are the ones I use constantly:
- Chicken and turkey (all cuts): 165°F
- Ground beef and ground pork: 160°F
- Whole cuts of beef, pork, lamb: 145°F, with a three-minute rest
- Medium rare steak temp sits around 130 to 135°F, which is below USDA guidelines for safety, so that’s a personal risk tolerance decision most home cooks make deliberately
The rest time isn’t decorative. At 145°F, holding that temperature for three minutes actually continues to reduce pathogens. It’s a time-plus-temperature equation, not just a single number. That’s why pulling a steak at 140°F and letting it rest on a warm plate for five minutes is genuinely different from cutting it immediately.
What I Do Now: I set two temperature targets in my head before I start cooking. The pull temperature and the final temperature. For chicken thighs, I pull at 160°F because I know they’ll climb to 165°F during resting. Stopped overcooking chicken the week I started doing this.
How to Use a Meat Thermometer in the Oven Without Ruining the Cook
Using a leave-in thermometer changes the game for larger cuts, but there are a couple of things that catch people off guard.
First, the probe wire. If you’re running it through the oven door seal to a digital display outside, make sure the wire isn’t kinked sharply against the oven rack or door edge. A bent wire can damage the connection over a two-hour cook and start giving you false readings. I run mine along the side of the oven door, not the hinge side.
Second, leave-in thermometers measure one spot. That’s fine for a prime rib where the center is what matters. For something like a whole turkey, I use a leave-in in the thickest part of the breast and then still check the thigh with a handheld before I call it done. Learning how to use a meat thermometer turkey-style taught me this, because the breast finished a full 20 minutes before the thigh on my first attempt.
Third, and this surprised me: oven temperature fluctuations affect your thermometer reading speed, not accuracy. The probe reads what it reads. But if your oven cycles dramatically, the internal meat temp graph will show slight stalls and bumps that can look alarming. They’re not. The meat is fine.
You May Also Like these Chicken Recipes :
Grilled California Avocado Chicken
Honey Garlic Baked Chicken Drumsticks
Reading a Non-Digital Thermometer (It’s Not as Complicated as It Looks)
Dial thermometers, the non digital kind, work on a different principle than digital probes. Inside the probe is a coiled metal strip that expands as it heats. That expansion moves the needle. Which means two things: they’re slower, and they have a specific “sweet spot” on the probe that needs to be inside the meat to read accurately.
That sweet spot is usually about 1 to 2 inches from the tip on most standard models. On thin cuts, this means the whole useful part of the probe needs to be inside the meat, which loops back to the geometry problem from the section above. If you’re trying to read a chicken breast with a dial thermometer and the probe is only in half an inch, you’re reading mostly surface temperature.
Dial thermometers also drift over time. You can test yours by putting it in boiling water: it should read 212°F at sea level (slightly lower at elevation). If it’s off by more than a couple of degrees, there’s usually a small nut behind the dial face you can turn to recalibrate it.
The Complete Guide to Handling Raw Chicken Safely at Home
FAQ
How do you use a meat thermometer correctly?
Insert the probe tip into the thickest part of the meat, away from bone, fat, and the pan surface. Wait for the reading to stabilize (2 to 5 seconds for digital, 15 to 20 for dial-style), and confirm you’re reading the actual muscle temperature, not a hot spot near bone or fat.
Can you leave a meat thermometer in the oven while cooking?
Only if it’s designed for it. Leave-in thermometers and oven-safe probe thermometers are built to handle sustained oven heat. Instant-read thermometers are not meant to stay in the oven, the casing can warp and the electronics can fail if left in prolonged heat.
Do meat thermometers really need to go in the thickest part?
Yes, because that’s the last part to reach a safe temperature. The edges and thinner sections cook faster and will always read higher. If the thickest part is safe, everything else already is too.
How long does it take for a meat thermometer to give a reading?
A digital instant-read thermometer takes about 2 to 5 seconds. An analog dial thermometer needs 15 to 20 seconds to stabilize. Pulling the probe too early is one of the most common reasons people get inaccurate readings.
Why does my meat thermometer give different readings in different spots?
Because meat isn’t uniform. Temperature varies based on thickness, proximity to bone, fat distribution, and how the heat source reaches different parts of the cut. Always take readings in multiple spots on large cuts, and average them or use the lowest reading to make your safety call.
You Can Check Also :
How to Cook Chicken Perfectly Every Time (Juicy, Tender & Never Dry)
10 Common Cooking Mistakes Beginners Make (And How to Fix Them Fast)
How to Read a Recipe Properly Before Cooking (Avoid Common Mistakes)
One last thing: once you start getting consistent internal temperature readings, you stop second-guessing every cook. The chicken looks right and you know it’s right. That confidence is quiet but it changes how cooking actually feels.